Welcome to the whimsical world of Interior painting, where walls become canvases and colors dance like they’re auditioning for a Broadway show! Forget the drab and embrace the fab as we untangle the mysteries of paintbrushes, rollers, and the elusive spray can. With a splash of humor and a dash of skill, we’ll guide you through the chaotic yet colorful journey of transforming your living space into a masterpiece.
As we dive into the nitty-gritty of this artistic endeavor, you’ll discover everything from selecting that perfect shade that makes your heart sing (or at least hum a catchy tune) to mastering techniques that ensure your paint job looks less like a toddler’s art project and more like a gallery exhibit.
Interior Painting Techniques
Transforming the interior of your home with a fresh coat of paint can feel like giving it a brand new wardrobe—only this time, your walls don’t complain about the fit! With a bit of creativity, a splash of humor, and some elbow grease, you can elevate your space from drab to fab. Understanding various painting techniques is key to achieving that polished look while avoiding the dreaded “oops” moments that come with DIY projects.
Various Interior Painting Techniques
When it comes to interior painting, you have a few trusty techniques at your disposal. Each method has its unique charm, so choose wisely and paint away like a pro! Here’s a quick rundown of the major players in the painting game:
- Brush Painting: Ideal for small areas and intricate details, brush painting allows for precision. Think of it as the fine-dining experience of painting—slow, methodical, and oh-so-satisfying.
- Roller Painting: Perfect for covering large surfaces quickly, roller painting is like the fast food of painting techniques. Just roll it on, and you’ll have quick coverage in no time! Make sure to use a nap length that suits your wall texture—short for smooth, long for textured.
- Spray Painting: For those who like to feel like artists with a canvas, spray painting offers a smooth and even finish. It requires a bit more setup and safety gear (hello, mask!), but the results can be breathtaking, especially for intricate patterns or faux finishes.
Preparing a Room for Painting
Before diving into your painting adventure, proper preparation is essential to prevent chaotic paint splatters and accidental rainbow effects! Here’s how to prep your room for a seamless painting experience:
- Clear the Area: Remove as much furniture as possible, or if it’s too heavy, just move it to the center of the room. It’s a great way to create a cozy furniture island!
- Cover Surfaces: Use drop cloths or old sheets to protect floors and furniture from paint spills. Remember, the goal is to keep the paint on the walls, not on your grandma’s antique chair.
- Tape Off Edges: Use painter’s tape to mask off edges, trim, and any areas you want to keep paint-free. This creates nice, crisp lines—like the border of a masterpiece!
- Patch and Sand: Fill in any holes or imperfections on the walls and sand them down for a smooth surface. A polished wall is a happy wall!
- Prime the Walls: If you’re making a drastic color change or painting over a glossy finish, a coat of primer can be your best friend.
Achieving Smooth Finishes and Avoiding Common Painting Mistakes
No one wants to be the subject of a “what-not-to-do” painting guide! To ensure those glossy walls look like they belong in a magazine, here are some tips to keep in mind:
“A smooth finish is the hallmark of a great paint job—no one wants to live in a wavy wonderland!”
- Use Quality Tools: Invest in good brushes and rollers. Cheap tools might save you a few bucks but can lead to a lumpy disaster.
- Don’t Overload Your Brush/Roller: Too much paint can lead to drips and uneven coats. It’s better to do multiple thin layers than one thick layer of regret.
- Keep a Wet Edge: Work in sections and overlap your strokes to avoid visible lines. Think of it like dancing—keep the rhythm flowing!
- Be Patient: Allow adequate drying time between coats. It’s tempting to rush, but patience is key to a flawless finish.
- Inspect Your Work: After the first coat dries, check for missed spots and imperfections. Touching up is like putting on the finishing touches of makeup—don’t skip it!
Color Selection and Effects
Choosing the right colors for your interior spaces is akin to selecting the perfect outfit for a first date; it sets the mood, enhances your features, and might even leave a lasting impression. The colors you choose can transform an ordinary room into a vibrant haven or a serene retreat, depending on your intentions. So, grab your paintbrushes and let’s dive into the colorful world of interior painting, where every hue tells a story!
Enhancing Ambiance with Color Palettes
Creating the right ambiance in each room is essential for setting the tone of your home. The color palette you select plays a pivotal role in this. Think of your living room as a stage, and the colors as the performers. Here are some key points to consider when choosing your color scheme:
- Warm Colors: Reds, oranges, and yellows are great for spaces where you entertain and socialize. They evoke warmth and energy, making your guests feel right at home.
- Cool Colors: Blues, greens, and purples create a serene and calming environment—perfect for bedrooms or offices where concentration is key.
- Neutrals: Whites, grays, and beiges serve as a fantastic backdrop, allowing your furniture and decor to shine. They are versatile and can adapt to any style.
- Accent Colors: Incorporate vibrant pops of color through accessories or an accent wall to add character without overwhelming the space.
Creating Illusions of Space and Light
In small areas, the right color choices can work wonders, making rooms feel larger and more inviting. Here’s how to use color to your advantage:
- Light Colors: Soft whites and light pastels reflect more light, making a small room feel airy and spacious. Imagine a tiny bathroom bathed in soft sky blue—it can feel like a refreshing retreat rather than a claustrophobic cubicle!
- Monochromatic Schemes: Using varying shades of a single color can create depth and prevent visual clutter, making the space appear more expansive.
- Ceiling Colors: Painting the ceiling a light color or even a soft blue mimics the open sky and adds height to your room.
- Mirrored Surfaces: While not a color, adding mirrored elements can reflect light and colors, creating an illusion of increased space.
Psychological Effects of Colors
Colors can influence our mood and emotions, often in ways we don’t even realize. The psychological effects of colors in interior spaces are profound and can significantly impact your daily life. Here are some noteworthy insights:
- Red: Often associated with excitement and passion, red can increase energy levels but may also stimulate aggression. Use sparingly, unless you want your guests to feel like they’ve just stepped onto a game show set!
- Blue: Known for its calming properties, blue can reduce stress and promote relaxation—ideal for bedrooms. Just be cautious not to go too dark, or you might create a moody cave.
- Yellow: This cheery color is linked to happiness and optimism, perfect for kitchens and dining areas. Just remember to balance it out with some cooler tones, or your home could resemble a giant banana!
- Green: Symbolizing nature, green instills a sense of tranquility and balance. It’s an excellent choice for spaces where you unwind, but lean towards softer hues to avoid an overwhelming forest effect.
“Color is the keyboard, the eyes are the harmonies, the soul is the piano with which we play.” – Wassily Kandinsky
Related Home Improvement Aspects
Interior painting is often seen as a standalone project, but it’s more like the sprightly friend who shows up at a party, making everything look better. When integrated with other home improvement endeavors, such as flooring upgrades and woodworking, interior painting can truly elevate the aesthetic appeal of your home. Let’s explore how these elements harmonize and how to keep your freshly painted surfaces shining like a star.
Complementing Home Improvement Projects
When you embark on home improvement projects, it’s essential to remember that they can work together beautifully. Interior painting complements upgrades in flooring and woodworking, creating a cohesive look that can transform any space. Here are a few ways to harmonize these projects:
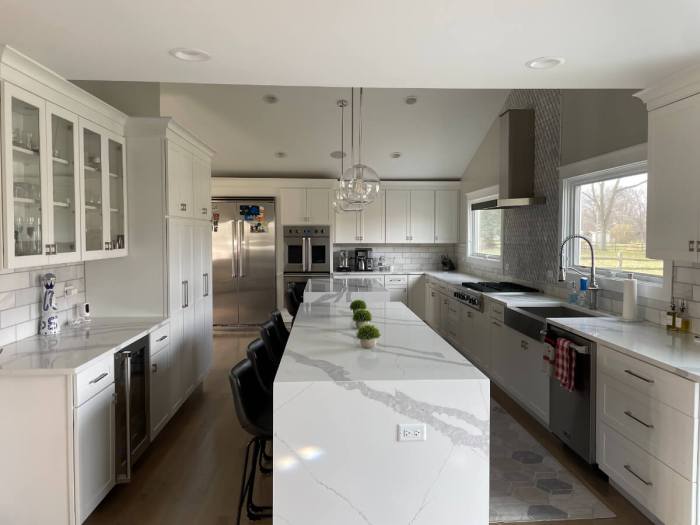
- Flooring Upgrades: Imagine a room with bright, airy walls and dark oak flooring. The contrast can create a stunning visual appeal. Choosing paint colors that either match or complement your new flooring can enhance the entire atmosphere.
- Woodworking Details: New moldings or cabinetry can pop against freshly painted walls. A rich, deep color can enhance the beauty of wood grains, while lighter shades can create an illusion of more space.
- Integrated Themes: Use your paint choice to tie together visual themes across rooms. If you’ve upgraded your flooring in an open-concept space, consider a continuous color palette that flows from one area to the next, keeping your design seamless.
Incorporating Feng Shui Principles
Selecting paint colors and finishes can also be influenced by Feng Shui principles, which focus on harmonizing individuals with their environment. Applying these concepts can lead to a more positive and balanced home. Here are key elements to consider:
- Color Selection: Colors like blue and green promote tranquility, while reds and oranges can energize a space. Choosing colors based on the function of a room can enhance its purpose—calm tones for bedrooms and vibrant shades for playrooms.
- Finish Matters: The finish of your paint can influence energy flow. Matte finishes absorb light and promote calm, while glossy finishes reflect light and energize spaces. Balance is key!
- Room Orientation: Different directions represent different elements in Feng Shui. South-facing rooms thrive with warm colors, while north-facing rooms benefit from brighter, lighter hues to counteract shadows.
Maintaining Painted Surfaces
To ensure your painted surfaces remain as stunning as the day they were completed, proper maintenance is essential. Here’s a guide to keeping your paint looking fresh and fabulous:
- Cleaning Regularly: Dusting painted surfaces with a soft cloth or duster can prevent buildup that dulls colors. For stains, use a damp cloth with mild soap, avoiding harsh chemicals.
- Touch-Ups: Keep a small amount of leftover paint for quick touch-ups. It’s like having a magic wand ready to fix dings and scratches!
- Inspecting for Damage: Regularly check for peeling or chipping and address these issues promptly to prevent larger problems. Spot repair now saves you from a major repainting later.
End of Discussion
So there you have it, brave wall warriors! With the right techniques and a splash of creativity, you’re now equipped to tackle your interior painting project head-on. Remember, each brushstroke is an opportunity to express yourself, and who knows? You might just stumble upon a shade of blue that sparks joy every time you walk into the room. Happy painting!
Essential FAQs
What tools do I need for interior painting?
You’ll need brushes, rollers, painter’s tape, drop cloths, and a good sense of humor!
How do I choose the right paint finish?
Choose a flat finish for ceilings, eggshell for living areas, and semi-gloss for kitchens or bathrooms.
How can I avoid paint drips?
Use painter’s tape, and don’t overload your brush or roller with paint. Less is more!
Should I prime before painting?
Yes, priming helps the paint adhere better and can save you from having to do multiple coats.
How do I clean up after painting?
Clean brushes and rollers with warm soapy water if using latex paint, and use mineral spirits for oil-based paints.