Welcome to the magical world of Woodworking projects, where sawdust becomes fairy dust and your dreams take shape in the form of stunning furniture! Whether you’re a novice with a hammer or a seasoned pro who can carve a statue of a unicorn, this guide has something for everyone. Get ready to unlock your inner carpenter and dive into projects that could impress even the most discerning woodpecker!
From beginner-friendly designs like a simple bookshelf to enhancements that can turn your home into an eco-friendly fortress, woodworking not only ignites creativity but also brings a sense of accomplishment with every cut and polish. Grab your tools, sprinkle a bit of imagination, and let’s build some wooden wonders together!
Popular Woodworking Projects

Woodworking is like a magic show, where you turn humble pieces of lumber into functional art. Whether you’re a novice with your trusty saw or a seasoned wood wizard, there’s a project waiting for you that promises both fun and satisfaction. Here, we’ll explore three beginner-friendly woodworking projects that will help you unleash your inner craftsman while avoiding the “oops” moments that can lead to unfortunate trips to the ER.
Beginner-Friendly Woodworking Projects
Starting your woodworking journey can be as delightful as finding an extra fry at the bottom of the bag. Here are three projects that will help you establish your skills without turning your garage into a lumberyard disaster.
- Birdhouse: Perfect for the aspiring ornithologist, this project invites your feathered friends for a cozy staycation. With just a few cuts and some nails, you can create a safe haven for your local avian buddies.
- Picture Frame: Capture memories in style by crafting a personalized picture frame. It’s like wrapping a hug around your favorite snapshots and will have your walls singing with charm.
- Simple Stool: A sturdy stool is a must-have for any household. It’s a versatile piece that can serve as extra seating or a makeshift side table for your favorite snacks during movie night.
Building a Simple Bookshelf
Creating a bookshelf is a rite of passage for any woodworking enthusiast. It’s a project that showcases your skills while providing a stylish home for your literary treasures (or your collection of cookbooks that you never actually use). Here’s a step-by-step guide to get you started:
1. Materials Needed
2×12 lumber for the shelves (length depends on desired width)
1×12 lumber for the sides
Wood screws
Wood glue
– Sandpaper Paint or wood finish (optional for flair)
2. Cutting the Pieces
Cut your 2×12 lumber to the desired length for the shelves. A common length is 36 inches. Cut two pieces of 1×12 lumber to the same height for the sides. A height of about 48 inches is typical.
3. Assembling the Frame
Attach the side pieces to the bottom shelf using wood screws and glue. Ensure the sides are perfectly vertical. A level is your best friend here!
4. Adding the Shelves
Depending on how many shelves you want, measure and mark equal distances between them on the side pieces. Secure them with screws.
5. Finishing Touches
Sand all edges to remove any splinters and ensure a smooth finish. If desired, apply a stain or paint to match your décor.
“A well-built bookshelf is not just a place for books; it’s a haven for imagination.”
Selecting the Best Wood Types for Various Projects
Choosing the right wood is like picking the perfect cheese for your charcuterie board; it can make or break the experience. Different woods have unique properties, aesthetics, and workability. Here’s a handy guide to help you navigate the forest of wood options:
- Pine: Ideal for beginners due to its affordability and ease of work. Great for projects like shelves or birdhouses where strength isn’t the biggest concern.
- A tough and durable hardwood that’s perfect for furniture. Its attractive grain makes it a favorite for visible projects, like tables or cabinets.
- Maple: Known for its fine, dense grain and creamy color, maple is excellent for kitchen items or cabinets. It’s a bit harder to work with but results in beautiful finishes.
Remember, each wood type brings its distinct personality to your project. So, pick wisely, and let your creations speak volumes!
Enhancements for Home Improvement through Woodworking
Transforming your living space through woodworking can not only elevate aesthetics but also boost functionality and energy efficiency. The beauty of crafting with wood lies in its versatility—whether you’re building a cozy nook or optimizing your home’s energy consumption. Let’s dive into how woodworking projects can enhance home improvement in a fun and functional way.
Woodworking Projects for Home Energy Efficiency
Integrating energy-efficient designs into your home through woodworking can lead to significant savings and a reduced carbon footprint. Consider projects that focus on insulation properties and natural materials. One excellent project is crafting custom wooden window frames with energy-efficient glazing. These frames can help maintain indoor temperatures, significantly reducing heating and cooling costs. When selecting wood, opt for species known for their thermal properties, such as oak or pine.Another project could involve installing wooden shutters.
These not only add charm but also create an additional insulation layer when closed, keeping interiors cozy during winter and cool in summer.
“Every wooden window frame installed is a step towards a warmer heart—and a cooler wallet!”
Integration of Feng Shui Principles in Woodworking for Home Decor
Feng Shui, the ancient Chinese art of spatial arrangement, can bring harmony and positive energy into your home through thoughtful woodworking designs. By choosing the right wood types and colors, you can enhance the flow of chi (energy) in your surroundings.For example, using light-colored woods like birch or maple in living areas promotes a sense of tranquility and spaciousness. Incorporating rounded edges in your wooden furniture helps avoid sharp angles, which can disrupt energy flow and create tension.Additionally, positioning wooden pieces in specific areas can create balance.
A wooden coffee table in the center of your living space invites interaction, while a handcrafted wooden shelf filled with plants enhances vitality and growth.
“Wood is not just a material; it’s a means to harmonize your living space with nature.”
Custom Wooden Cabinets for Enhanced Bathroom Functionality
The bathroom is often an overlooked sanctuary in the home, and custom wooden cabinets can significantly enhance its functionality and style. These cabinets can be tailored to fit any space, ensuring optimal usage of every nook and cranny.Consider a cabinet with built-in shelving that accommodates toiletries while keeping them out of sight. Utilize wood species like teak or cedar, which are resistant to moisture, ensuring longevity and maintaining a fresh scent in your bathroom.Additionally, incorporating features like pull-out drawers can enhance accessibility, making it easier to retrieve items without the hassle of rummaging through clutter.
“Custom cabinets are like a well-tailored suit for your bathroom—functional, stylish, and perfectly fitted!”
Woodworking Tools and Techniques
Woodworking is an art that combines precision, creativity, and a dash of elbow grease. Whether you’re building a cozy bookshelf to house your collection of mystery novels or crafting exquisite wooden toys for the kids, having the right tools and techniques can turn any project from “meh” to magnificent. Let’s dive into the essential tools and methods that will turn your woodworking dreams into reality—without losing a finger or two in the process!
Essential Woodworking Tools for Home Projects
Equipping your workshop with the right tools is paramount for any woodworker, whether you are an amateur or a seasoned pro. These tools will help you slice, dice, and create with finesse:
- Hand Saw: This classic tool is your best friend for making straight cuts. With a bit of practice, you’ll be cutting like a pro—no power needed!
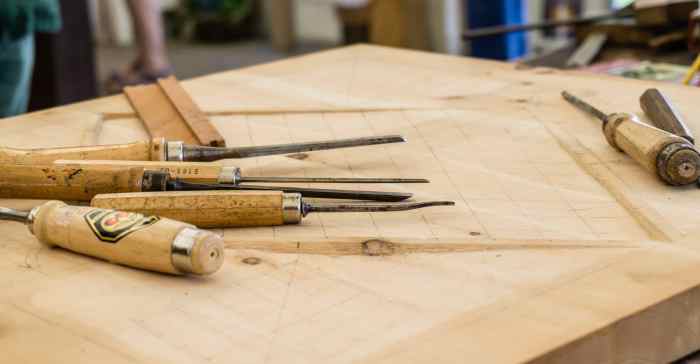
- Chisels: Great for carving and shaping wood, a good set of chisels can turn your projects from rough to refined.
- Clamps: These hold your pieces in place while you work. Remember, a good clamp is like a loyal friend—always there when you need it!
- Drill: Perfect for making holes, a cordless drill is a must-have for every home workshop. It’s like an all-access pass to the world of woodworking.
- Router: This is your go-to tool for adding decorative edges and grooves. It’s the icing on the cake for most projects.
- Sanders: A smooth finish is essential, and a sander will give your woodworking projects that velvety touch.
- Measuring Tape: Measure twice, cut once—this age-old adage is the law of woodworking. A trusty measuring tape will keep your projects accurate and your sanity intact.
- Workbench: A sturdy workbench provides the perfect foundation for your projects and can double as a makeshift dining table when required. Who said multitasking isn’t possible?
Proper Techniques for Using Hand Tools Versus Power Tools
Understanding the nuances of hand tools versus power tools can significantly enhance your woodworking game. Both have their merits, but knowing when to use which can be the secret sauce to success.When using hand tools, embrace the art of manual craftsmanship. Start with a firm grip, maintain a steady hand, and respect the wood. It’s about finesse; like dancing with a partner, you need to feel the rhythm of the wood.
For example, when using a hand saw, let the saw do the work. A gentle push and pull will create smooth cuts without excessive force.In contrast, power tools are all about efficiency. A power drill can drive screws in seconds, making it a champion for larger projects. However, precision is key. Always wear safety goggles and use clamps to secure your workpiece, letting the tool work its magic without risking a trip to the emergency room.
“A tool is only as good as the craftsman using it.”
Step-by-Step Process for Finishing and Maintaining Wooden Surfaces
Finishing wooden surfaces is where the magic happens. It’s like putting the final touches on a masterpiece. Here’s a simple yet effective process to achieve a stunning finish:
1. Preparation
Start by sanding your wooden surface with progressively finer grits of sandpaper. Begin with a coarse grit to eliminate any rough spots and work your way to a finer grit for a silky-smooth finish.
2. Cleaning
After sanding, wipe down the surface with a damp cloth to remove dust. It’s like giving your wood a refreshing shower before its big day!
3. Staining
Apply wood stain to enhance the color and grain of the wood. Use a brush or cloth, and remember to test on a scrap piece first. You want to be the Picasso of stains, not a toddler with finger paints!
4. Sealing
Once the stain has dried, add a protective finish like polyurethane or varnish. This will shield your masterpiece from moisture and daily wear. Apply in thin coats, allowing each coat to dry fully.
5. Polishing
For that extra bit of shine, after the last coat has dried, buff the surface with a soft cloth. You’ll be able to see your reflection… and possibly your woodworking dreams!
6. Maintenance
Regularly dust your finished pieces and reapply a fresh coat of sealing every few years. It’s like a spa day for your wood!With these tools, techniques, and finishing processes in tow, you’re well on your way to becoming a woodworking wizard in your own right. Now, grab your gear and let the sawdust fly!
Final Review
In the end, Woodworking projects are more than just a way to fill your weekends; they’re an adventure waiting to unfold. Whether you’re crafting furniture that could host a royal tea party or installing cabinets that would make a bathroom feel like a spa, each project tells a story of craftsmanship and creativity. So, pick up that saw, let your wood glue flow, and embark on a journey where the only limit is your imagination!
FAQ Corner
What is the best type of wood for beginners?
Pine is often recommended for beginners due to its availability, affordability, and ease of use!
How can I make my woodworking projects more eco-friendly?
Using reclaimed wood or sustainable wood sources and natural finishes can make your projects greener!
Do I need expensive tools to start woodworking?
Nope! You can start with just a few basic tools; quality matters more than quantity!
Can woodworking be a profitable hobby?
Absolutely! Many woodworkers sell their creations for a nice profit, turning passion into cash!
How do I maintain my woodworking tools?
Regular cleaning, sharpening blades, and oiling moving parts will keep your tools in tip-top shape!